Chest Freezer Maintenance: Your Essential Guide to Longevity and Efficiency

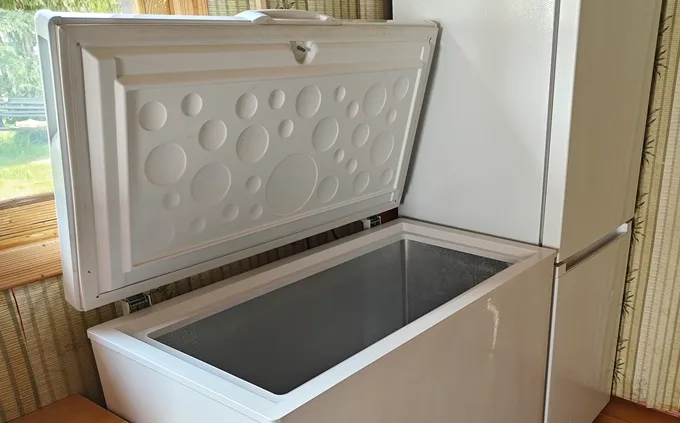
A chest freezer that is clean and well-maintained following expert freezer maintenance tips

Your chest freezer is a significant investment, a silent workhorse preserving your food and saving you money. But like any vital appliance, it demands attention to perform optimally and last for years.

Neglecting its basic needs can lead to inefficiency, premature failure, and unexpected costs.

This comprehensive guide provides you with the authoritative knowledge and simple steps to maintain your chest freezer, ensuring its longevity and consistent, reliable performance.

KEY TAKEAWAYS

  • Defrost when frost reaches ¼ inch to maintain efficiency and reduce compressor strain.
  • Inspect and clean the lid gasket monthly to prevent energy loss and excess frost buildup.
  • Monitor temperature at 0°F and clean coils annually to extend freezer lifespan and performance.

Why Does Chest Freezer Maintenance Matter?

Maintenance is not merely about fixing problems; it is about preventing them.

For your chest freezer, regular care and upkeep translates directly into energy efficiency, prolonged lifespan, and the safety of your stored food. Think of it as a protective shield against future malfunctions.

The Hidden Costs of Neglect

Ignoring routine maintenance is akin to leaving your bank account open for withdrawals. What are these hidden costs?

  • Elevated Energy Bills: A poorly maintained freezer, especially one with excessive frost, works harder to maintain the ideal temperature, consuming significantly more electricity. This translates directly to higher utility costs month after month.
  • Premature Appliance Failure: Small issues, left unaddressed, can escalate into major mechanical breakdowns. This often means expensive repairs or, worse, the need for a complete replacement far sooner than anticipated.
  • Food Spoilage Risk: Temperature fluctuations or sudden failures can compromise the quality and safety of your frozen goods, leading to waste and potential health risks.
  • Repair Expenses: When a component fails due to lack of care, the repair bill or cost of freezer replacement can be substantial, often catching you off guard.
  • Warranty Coverage: Keep your manufacturer warranty intact by following the use and maintenance directions in the owner’s manual.

By investing a small amount of time in regular maintenance, you protect yourself from these significant financial and practical burdens.
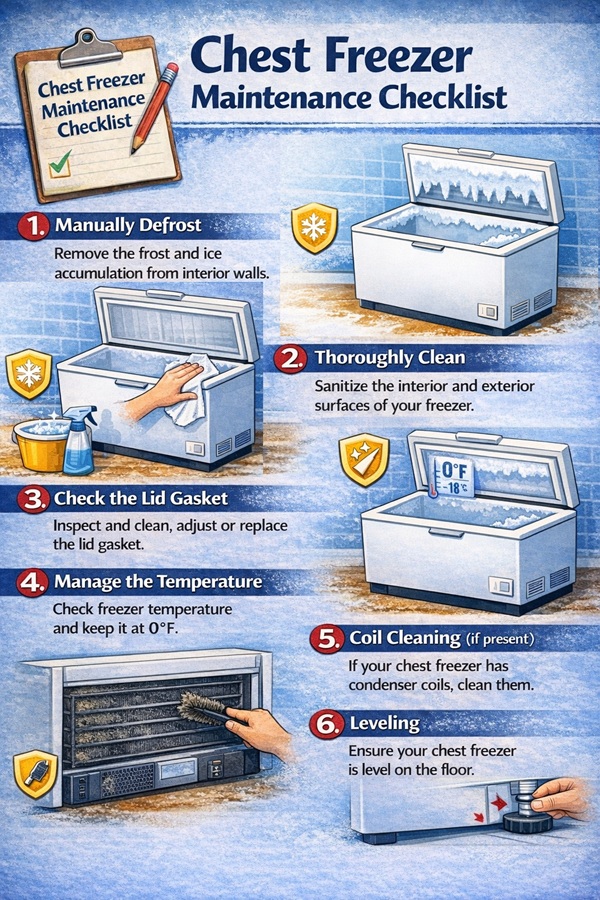

step-by-step-chest-freezer-maintenance

Your Essential Chest Freezer Maintenance Checklist

This checklist provides a structured approach to caring for your chest freezer. Follow these freezer maintenance tips diligently to ensure peak performance.
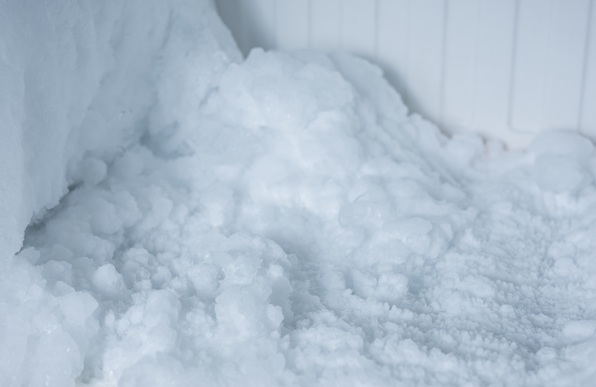
how-to-defrost-a-chest-freezer

1. Manual Defrosting: The Cornerstone of Efficiency

What is it? Defrosting your freezer involves removing the ice accumulation from the interior walls of your freezer.

Why is it crucial? Ice acts as an insulator. A thick layer of ice forces your freezer's compressor to run longer and harder, consuming more energy and potentially shortening its lifespan. Think of it as trying to cool a room with a thick blanket wrapped around the air conditioner.

How often? When ice buildup reaches approximately a quarter-inch thick. This typically occurs every 6-12 months, depending on usage and humidity.

Actionable Steps:

1.Preparation is Key: Transfer all frozen food to ice chests with ice or ice packs.
2. Unplug and Open: Unplug the power cord to disconnect the freezer from power. Leave the lid open to accelerate the thawing process.
3. Contain the Melt: Place towels or shallow pans at the bottom to catch melting ice. Many freezers have a drain plug at the bottom front; remove it and place a pan underneath.
4. Expedite Thawing (Optional but Recommended): Place bowls of hot water inside or use a hairdryer on a low, non-heating setting (keep it at a safe distance and never aim at any plastic components). Do not use sharp objects to chip away ice, as this can puncture the liner and cause irreparable damage.
5. Wipe Dry: Once all ice has melted, thoroughly dry the interior to prevent immediate re-frosting. Replace the drain plug and restore electrical power.
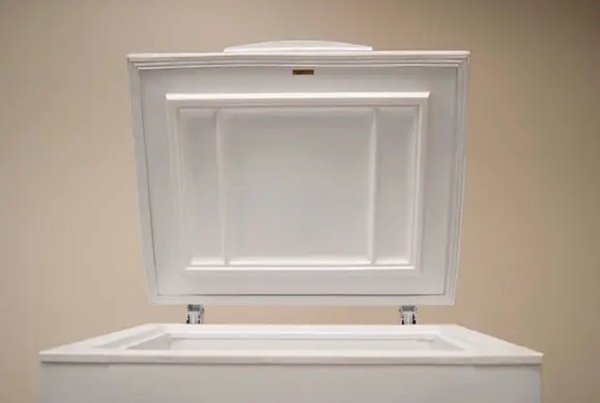
clean-the-chest-freezer

2. Cleaning: More Than Just Aesthetics

What is it? This involves sanitizing the interior and exterior surfaces of your freezer.

Why is it crucial? Regular cleaning prevents odors, removes spills, and helps maintain a hygienic storage environment for your food.

How often? During each defrosting cycle and as needed for spills.

Actionable Steps:
  1. Interior Cleanse: After defrosting, wipe down the interior with a solution of warm water and a mild dish soap or a baking soda solution (two tablespoons of baking soda per quart of warm water).
  2. Rinse and Dry: Wipe with a clean, damp cloth to remove the soapy water solution. Thoroughly dry with a clean towel. Ensure no moisture remains.
  3. Exterior Cleaning: Clean the exterior surfaces with a general household cleaner suitable for appliances. Clean the vent louvers on the compressor compartment cover to ensure proper airflow through that space.

checking-the-chest-freezer-lid-gasket

3. Gasket Care: The Seal of Protection

What is it? The gasket is the rubber seal around the lid that keeps cold air in and warm air out.

Why is it crucial? A compromised gasket is like an open door to your freezer's efficiency. It allows warm, moist air to enter, leading to frost buildup, increased energy consumption, and inconsistent temperatures.

How often? Monthly.

Actionable Steps:

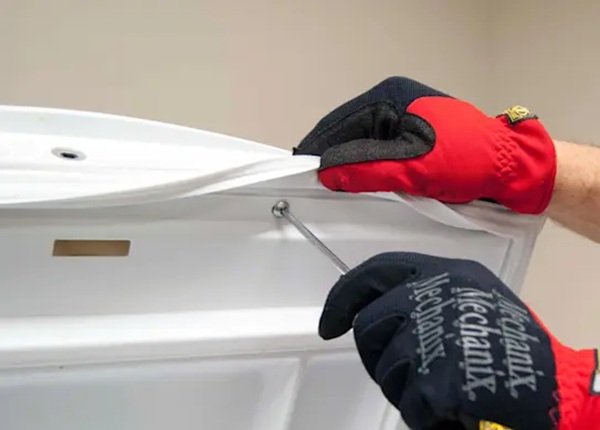
  1. Inspect Visually: Check the gasket for cracks, tears, stiffness, or signs of mold/mildew.
  2. Clean Thoroughly: Wipe the gasket with a damp cloth and mild soap. Rinse and dry completely.
  3. Test the Seal: Perform the "dollar bill test." Close the lid on a dollar bill, half in and half out. If you can pull the bill out easily, the seal is weak. Repeat this around the entire perimeter. If the seal is consistently weak, consider replacing the gasket.

Pro tip: If you have an upright freezer, follow these same preventive maintenance tips to keep the door seal in top shape and prevent warm air from entering the cabinet through the freezer door.

deep-freezer-temperature-control-dial

4. Temperature Management: The Heart of Preservation

What is it? Ensuring your freezer maintains the optimal temperature.

Why is it crucial? Correct temperature (0°F / -18°C) is vital for food safety and quality. Any warmer, and food can deteriorate; any colder, and you're wasting energy.

How often? Check weekly, and adjust as needed.

Actionable Steps:
  1. Use a Freezer Thermometer: Place an appliance thermometer inside the freezer. Do not rely solely on the dial setting.
  2. Monitor and Adjust: Check the thermometer regularly. If the temperature deviates, adjust the freezer's thermostat accordingly. Allow several hours for the temperature to stabilize after an adjustment.

clean-the-freezer-condenser-coils

5. Coil Cleaning: Breathing Room for Your Freezer

What is it? The condenser coils dissipate heat from the freezer. They are typically located at the back or underneath the unit. (Many chest freezers don’t have these coils. Skip this step if your chest freezer doesn’t have condenser coils.)

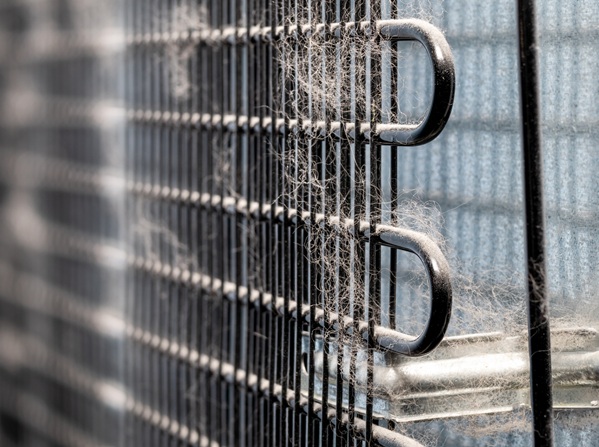
Why is it crucial? Dusty coils hinder heat exchange, forcing the compressor to work harder, increasing energy consumption, and shortening its lifespan. Imagine trying to breathe through a thick, dusty filter.

How often? Annually, or more frequently if you have pets.

Actionable Steps:
  1. Safety First: Unplug the freezer from the power outlet.
  2. Locate Coils: Consult your owner's manual to find the exact location of the condenser coils (if your freezer model has them).
  3. Dust Removal: Use a vacuum cleaner with a brush attachment or a coil brush to gently remove dust, dirt, and pet hair.
  4. Restore Power: Plug the freezer back in.

leveling-the-chest-freezer

6. Leveling: A Foundation for Function

What is it? Ensuring your freezer sits perfectly level on the floor.

Why is it crucial? An unlevel freezer can cause the lid to not seal properly, lead to unusual noises, and place undue stress on the internal components.

How often? Annually, or if you move the freezer.

Actionable Steps:

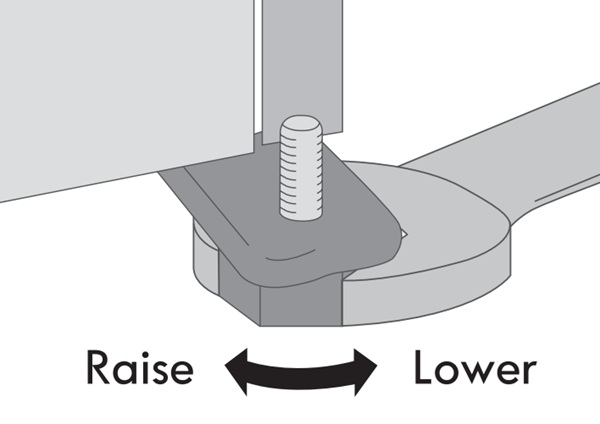
  1. Use a Level: Place a carpenter's level on top of your freezer, checking both front-to-back and side-to-side.
  2. Adjust as Needed: Most freezers have adjustable feet. Turn them clockwise or counter-clockwise to raise or lower corners until the unit is perfectly level.

Troubleshooting Common Chest Freezer Issues

Even with diligent maintenance, minor issues can arise. Here’s how to address common problems.

Excessive Frost Buildup

Problem: Frost accumulates rapidly, much faster than the typical 6-12 month defrost cycle.

Possible Causes & Solutions:

  • Leaky Gasket: Inspect and clean the gasket. Replace the freezer lid gasket if damaged.
  • Frequent Lid Opening: Minimize how often and how long the lid is open.
  • Hot/Humid Environment: If the freezer is in a hot garage, consider relocating it or improving ventilation.
  • Warm Items Stored: Ensure food is cooled before being placed in the freezer.

Unusual Noises

Problem: Grinding, clanking, or excessive humming sounds.

Possible Causes & Solutions:

  • Unlevel Unit: Check and adjust the leveling feet.
  • Item Contact: Ensure no items inside are vibrating against the freezer walls.
  • Condenser Fan (if applicable): If the noise originates from the back, dust buildup on the condenser fan could be the cause. Unplug and clean the fan blades gently.
  • Compressor Issues: If the noise is a persistent, loud grinding, it might indicate a failing compressor, requiring professional intervention.

Inconsistent Cooling

Problem: Food items are not consistently frozen, or there are warm spots.

Possible Causes & Solutions:

  • Compressor Cover Vent Louvers Blocked: Placing an item in front of the vent louvers of the compressor compartment cover is a common cause of chest freezer cooling problems. The compressor can overheat and shut off periodically when these vent louvers are blocked.
  • Thermostat Setting: Verify the temperature setting and use a thermometer to check actual temperature (refer to Section 4).
  • Overloading: Do not overfill the freezer. Allow space for air circulation.
  • Dirty Condenser Coils: Clean the coils thoroughly (refer to Section 5).
  • Leaky Gasket: Inspect and address any gasket issues (refer to Section 3).
  • Compressor or Refrigerant Issue: If basic troubleshooting fails, this could indicate a more serious internal problem.

schedule-freezer-repair-service

When to Call a Professional

While much of chest freezer maintenance is DIY-friendly, some issues demand the expertise of a qualified technician.

Signs It's Time for Expert Intervention

  • Freezer Not Cooling At All: If you hear the freezer running but it’s not getting cold, or the compressor keeps overheating and kicking off on overload shortly after starting.
  • Persistent Loud Noises: Especially if they are grinding, clicking, or extremely unusual sounds that don't resolve with leveling or coil cleaning.
  • Visible Refrigerant Leaks: Any oily residue or unusual odors could indicate a refrigerant leak, which requires immediate professional attention due to environmental and health concerns.
  • Electrical Issues: Tripped breakers, sparking, or burning smells. Always unplug the unit immediately if you suspect an electrical problem.
  • Error Codes: If your freezer has a digital display and shows an error code that your manual cannot explain.
  • Ice Buildup on Coils Inside: Most residential chest freezers don’t have an automatic defrost system. If you have a chest freezer with evaporator fins inside the freezer and they are completely frosted over, this can indicate a defrost system malfunction that will likely require professional repair.

Schedule freezer repair when you’re unable to resolve a chest freezer failure on your own.

Your Proactive Approach to Freezer Longevity

Maintaining your chest freezer is an act of proactive ownership. By regularly addressing these simple yet critical tasks, you are not just ensuring your appliance functions; you are extending its life, maximizing its efficiency, and safeguarding your valuable food stores.

Adopt this mindset of consistent care, and your chest freezer will reliably serve you for many years to come.


Frequently Asked Questions

How often should you defrost a chest freezer?
You should defrost a chest freezer when frost buildup reaches about ¼ inch thick, which usually happens every 6 to 12 months depending on usage and humidity. Excess frost forces the compressor to work harder, increasing energy consumption and reducing efficiency. To defrost, unplug the freezer, remove the food, allow the ice to melt naturally or with bowls of hot water, and thoroughly dry the interior before restarting. Never chip ice away with sharp objects, as this can permanently damage the liner.
What temperature should a chest freezer be set at?
A chest freezer should be set at 0°F (-18°C) to ensure safe food storage and optimal preservation. This temperature keeps food fully frozen without wasting energy. Use an appliance thermometer inside the freezer rather than relying solely on the control dial, and check it weekly to confirm consistent performance. If adjustments are needed, allow several hours for the temperature to stabilize.
Why is my chest freezer building up frost so quickly?
Rapid frost buildup is typically caused by warm, moist air entering the freezer. This can result from a worn or dirty lid gasket, frequent lid openings, placing warm food inside, or operating the freezer in a humid environment. Inspect and clean the gasket regularly, minimize how long the lid stays open, and allow food to cool before freezing. If frost continues accumulating unusually fast, the seal may need replacement or professional service may be required.
How do you maintain a chest freezer to extend its lifespan?
Maintaining a chest freezer involves a step-by-step process of regular defrosting, interior cleaning, gasket inspection, temperature monitoring, and annual condenser coil cleaning (if your model has condenser coils). Keeping the freezer level and ensuring proper airflow around the compressor also prevents unnecessary strain on internal components. Consistent preventive maintenance improves energy efficiency, promotes energy savings, protects stored food, and significantly reduces the risk of premature appliance failure.

Schedule your freezer maintenance now!

Sears technicians know all the top freezer brands. We can maintain your appliance no matter where you bought it.

Call(213) 596-2538 or schedule online now.
svg-animation

Loading scheduler options...

Maintain Freezer Resources

Glossary Terms

A freezer bag is a specially designed plastic bag used for the cold storage of food in the freezer, offering protection against freezer burn and preserving the food's freshness and flavor over extended periods.

A freezer compressor is a vital component of a freezer's refrigeration system, functioning as a pump to circulate refrigerant through the system, which cools the interior by absorbing and expelling heat.

A freezer door gasket is a flexible seal that outlines the edge of the freezer door, ensuring an airtight closure to maintain cold temperatures inside and prevent warm air from entering.

A manual defrost freezer is an appliance that needs to be switched off and allowed to thaw periodically to remove accumulated ice, ensuring efficient operation and storage space maximization.

Common Repair Freezer Symptoms

The most common reasons your LG freezer is leaking water are a clogged drain tube, cracked water tubing or a bad evaporator.

The most common reasons your Maytag freezer is leaking water are a clogged drain tube, cracked water tubing or a bad evaporator.

The most common reasons your Electrolux freezer is leaking water are a clogged drain tube, cracked water tubing or a bad evaporator.

The most common reasons your Frigidaire freezer is leaking water are a clogged drain tube, cracked water tubing or a bad evaporator.

The most common reasons your Kenmore freezer compressor is not running are a failed compressor, malfunctioning electronic control board or a bad evaporator.

The most common reasons your Haier freezer is leaking water are a clogged drain tube, cracked water tubing or a bad evaporator.