
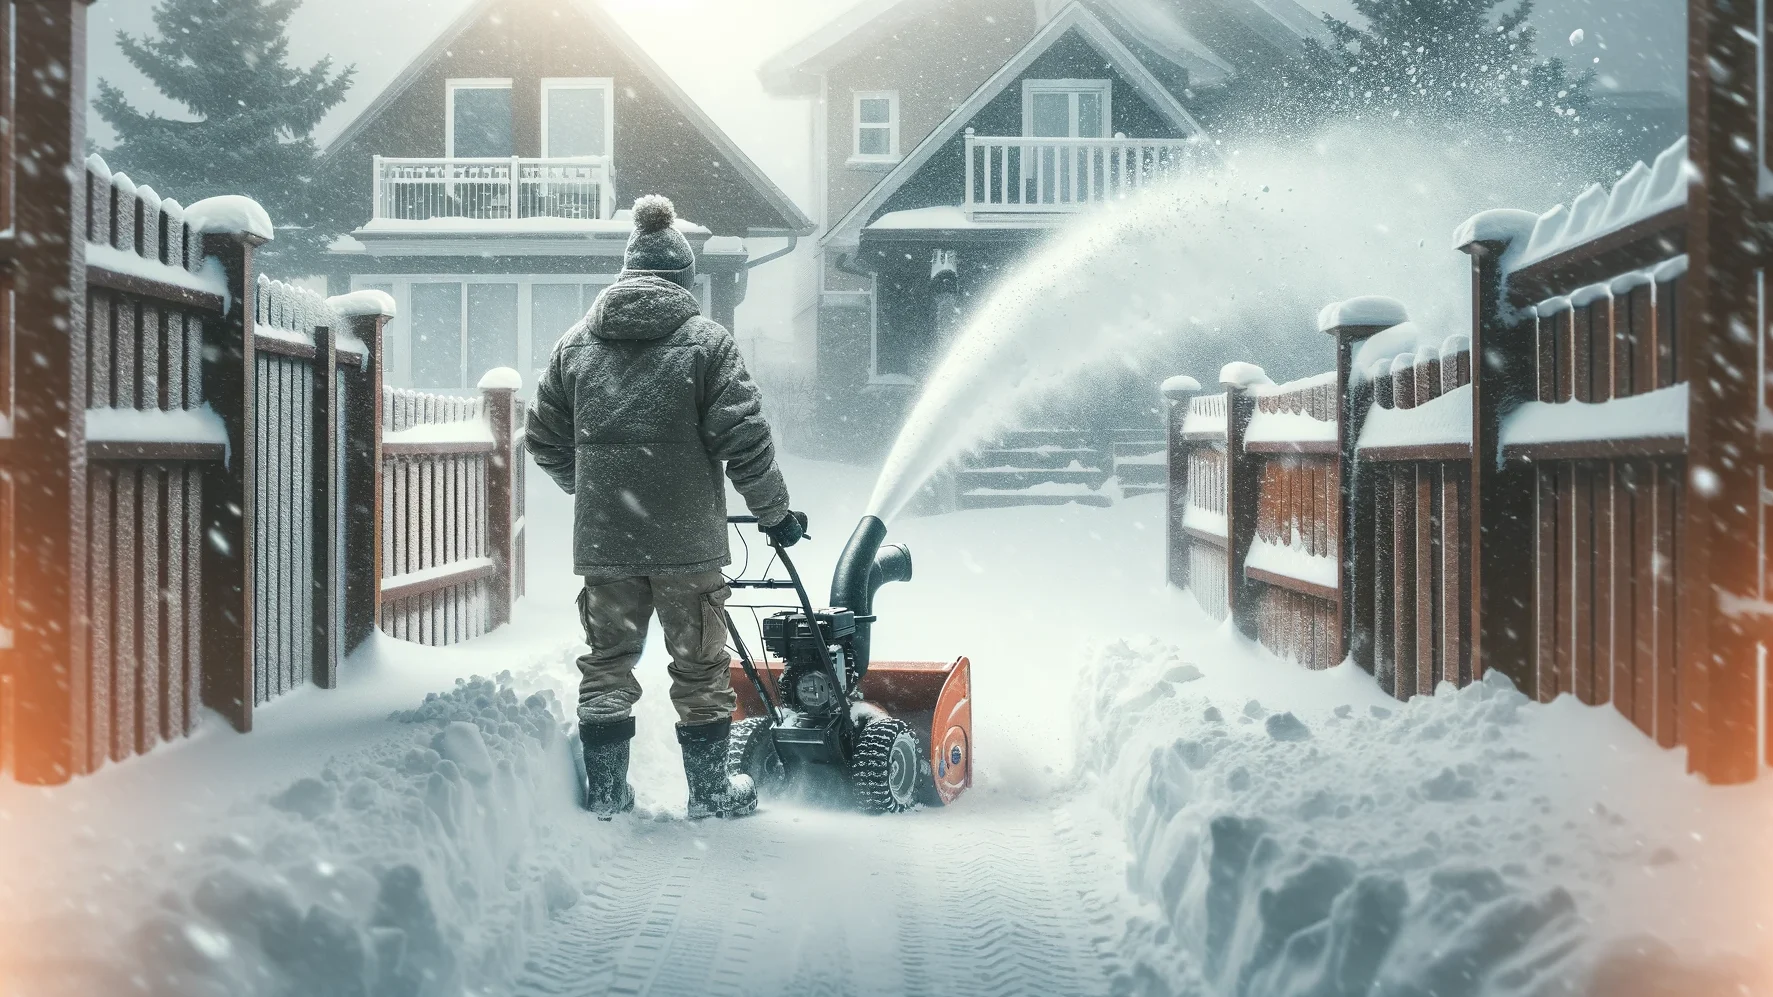
Get your snowblower ready for winter in 2026 with Sears Home Services.
These essential maintenance tips will ensure your snow blower is ready to tackle the snow. From changing the spark plug to checking the belts and inspecting the paddles, follow these steps recommended by Amanda Campana, Craftsman product manager for Sears, to keep your snow blower running smoothly when the next snowstorm hits.
KEY TAKEAWAYS
Be ready before the next snow storm hits by performing some routine maintenance on your snow blower now. Follow the expert tips in this checklist of what to do before the first snowstorm.
(Text Version of Infographic)
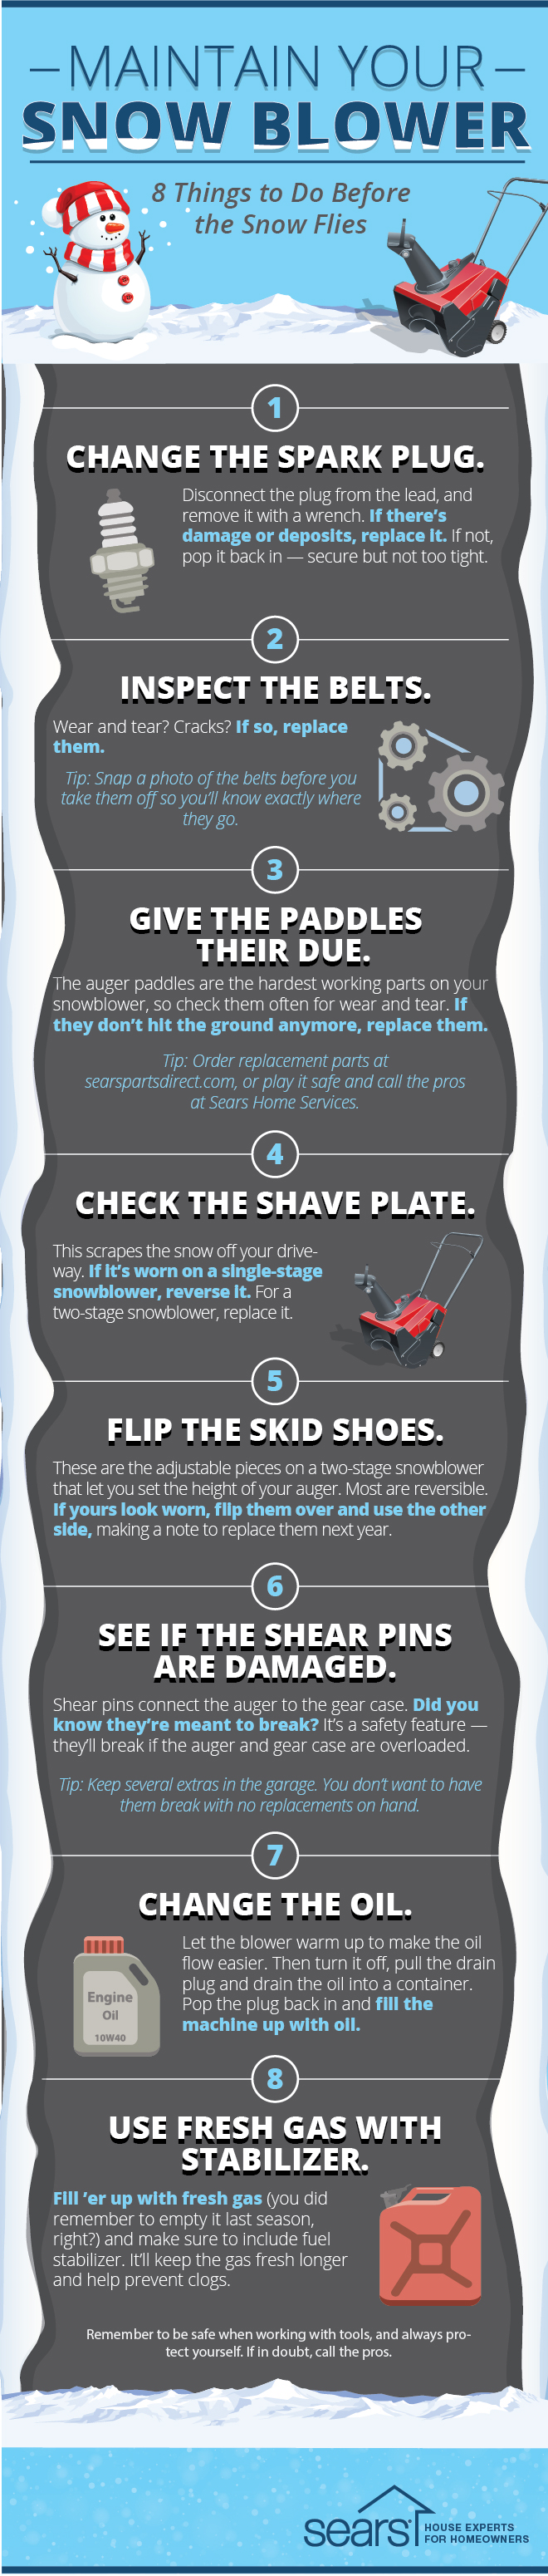
Disconnect the plug from the lead, and remove it with a wrench. If there’s damage or deposits, replace it. If not, pop it back in – secure but not too tight.
Did you find excessive wear and tear? Cracks? If so, replace them.
Tip: Snap a photo of the belts before you take them off so you’ll know exactly where they go.
The auger paddles are the hardest working parts on your snow blower, so check them often for wear and tear. If they don’t hit the ground anymore, replace them.
Tip: Order replacement parts from searspartsdirect.com, or play it safe and call the pros at Sears Home Services.
This scrapes the snow off your driveway. If it’s worn on a single-stage snow blower, reverse it. For a two-stage snow blower, replace it.
These are the adjustable pieces on a two-stage snow blower that let you set the height of your auger. Most are reversible. If yours look worn, flip the over and use the other side, making a note to replace them next year.
Shear pins connect the auger to the gear case. Did you know they’re meant to break? It’s a safety feature – they’ll break if the auger and gear case are overloaded.
Tip: Keep several extras in the garage. You don’t want to have them break with no replacements on hand.
Let the blower warm up to make the oil flow easier. Then turn it off, pull the drain plug and drain the oil into a container. Pop the plug back in and fill the machine up with oil.
Fill ‘er up with fresh gas (you did remember to empty it last season, right?) and make sure to include fuel stabilizer. It’ll keep the gas fresh longer and help prevent clogs.
Remember to be safe when working with tools, and always protect yourself. If in doubt, call the pros at Sears Home Services.
Ensure your snowblower is ready for winter with our thorough maintenance service, designed to keep it running smoothly and efficiently through the harshest weather conditions.
Loading scheduler options...
Get your snowblower ready for winter in 2026 with Sears Home Services.

Uncover the facts about how to use a snowblower and debunk common snowblower safety and use myths. Learn what you need to know to keep your snowblower running safely and efficiently this winter.

Prepare your snow blower for the winter battle against snow-covered driveways and pathways with these essential repair tips.

Understanding the different types and features is key to finding the best snow blower for your winter needs.
A snowblower auger is the spiral-shaped blade mechanism at the front of a snowblower that cuts through snow, breaking it up and directing it towards the chute for expulsion, playing a crucial role in the snow clearing process.
A dishwasher basket is a removable container designed to securely hold small items like cutlery and utensils during the wash cycle, ensuring efficient cleaning without loss or damage.
A dishwasher end panel is a finishing piece installed on the exposed side of a dishwasher, primarily when it is at the end of kitchen cabinetry, to ensure a seamless and aesthetically pleasing look in the kitchen.
ENERGY STAR appliances are energy-efficient products that meet the strict energy efficiency specifications set by the U.S. Environmental Protection Agency or the U.S. Department of Energy. These appliances are designed to use less energy and water, leading to cost savings and a reduced environmental impact.
When your Payne central air conditioner won’t turn on or isn’t cooling, check for power problems, a failed capacitor, or a clogged condensate drain. This guide covers quick, safe troubleshooting steps and explains when to call Sears Home Services for expert central AC repair.
When your ICP central air conditioner won’t turn on or isn’t cooling, check for power problems, a failed capacitor, or a clogged condensate drain. This guide covers quick, safe troubleshooting steps and explains when to call Sears Home Services for expert central AC repair.
When your Heil central air conditioner won’t turn on or isn’t cooling, check for power problems, a failed capacitor, or a clogged condensate drain. This guide covers quick, safe troubleshooting steps and explains when to call Sears Home Services for expert central AC repair.
When your Carrier central air conditioner won’t turn on or isn’t cooling, check for power problems, a failed capacitor, or a clogged condensate drain. This guide covers quick, safe troubleshooting steps and explains when to call Sears Home Services for expert central AC repair.
When your Comfortmaker central air conditioner won’t turn on or isn’t cooling, check for power problems, a failed capacitor, or a clogged condensate drain. This guide covers quick, safe troubleshooting steps and explains when to call Sears Home Services for expert central AC repair.
When your Ruud central air conditioner won’t turn on or isn’t cooling, check for power problems, a failed capacitor, or a clogged condensate drain. This guide covers quick, safe troubleshooting steps and explains when to call Sears Home Services for expert central AC repair.