 Appointment Lookup
 213-596-2538


Discover how a refrigerator works, from the cooling cycle to key components. Learn maintenance tips and know when to seek professional repair for efficient cooling.
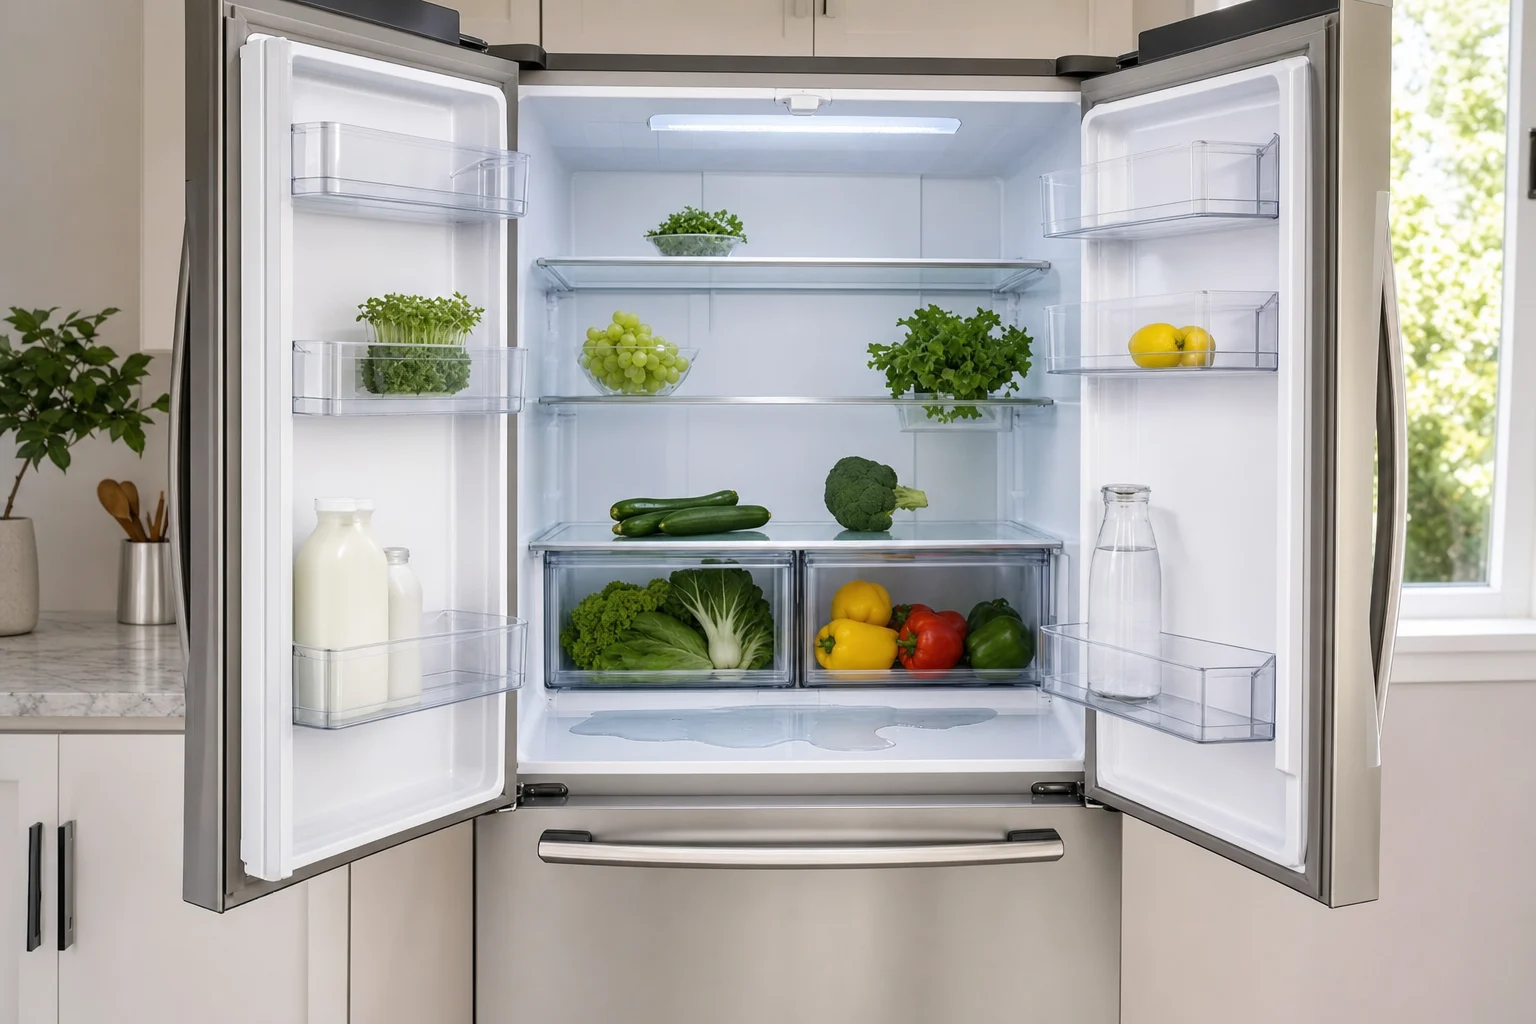
A fridge leaking water inside is almost always caused by a clogged defrost drain, which backs up meltwater into the refrigerator compartment. Other causes include a blocked or frozen water supply line, a cracked drain pan, a damaged door gasket letting in warm humid air, or an unlevel refrigerator preventing proper drainage. The good news: most interior leaks are fixable without replacing the appliance. This guide from Sears Home Services walks you through how to identify the source, try safe DIY fixes, and know when it's time to call a manufacturer-trained technician.
KEY TAKEAWAYS
Interior fridge leaks always trace back to one of a handful of root causes. Before you start pulling the fridge apart, it helps to know what you're looking for. Here are the five most common culprits.
The defrost drain is the #1 cause of interior leaks. Every refrigerator runs a defrost cycle to melt frost off the freezer coils. That meltwater is supposed to run down a small drain tube into a pan under the fridge, where it evaporates. When food particles, ice, or debris clog that drain, water backs up — and gravity sends it into the refrigerator compartment, usually pooling under the crisper drawers.
If your fridge has an ice maker or water dispenser, the supply line can crack or freeze. A pinhole leak or ice blockage sends water inside the cabinet instead of to the dispenser. You'll often see this as a slow, persistent drip rather than a sudden puddle.
A torn or dirty door gasket breaks the seal. Warm, humid room air gets in, condenses on the cold interior surfaces, and drips down. In humid climates this is a frequent cause of what looks like a mystery leak with no visible source.
A fridge tilted the wrong way won't drain correctly. Manufacturers design most refrigerators to sit slightly tilted back so the doors self-close and meltwater flows toward the drain. If yours is tilted forward, meltwater can spill out the front instead of draining.
The drain pan sits underneath the fridge and catches evaporating water. If it cracks or shifts out of place, water collects on the floor — but a misaligned internal drain trough can also spill water back inside the cabinet.
A clogged defrost drain shows the same three symptoms almost every time. If you see any of these, start your troubleshooting here.
Pull out the crisper drawers and check the floor of the refrigerator compartment. A small pool of clear water sitting under the drawers — often refilling a day or two after you wipe it up — is the classic signature of a backed-up defrost drain. You can read more about this specific issue on our refrigerator leaking water symptom page.
Open the freezer and look at the bottom. A sheet of ice under the baskets means meltwater is freezing in place because it can't drain. This ice sheet grows a little with every defrost cycle until it eventually spills forward.
Once the interior puddle gets large enough — or once the ice sheet in the freezer melts and overflows — water starts showing up on your kitchen floor in front of the fridge. At that point the clog has been building for a while.
Most homeowners can clear a defrost drain clog in under an hour with basic tools. Work through these steps in order.
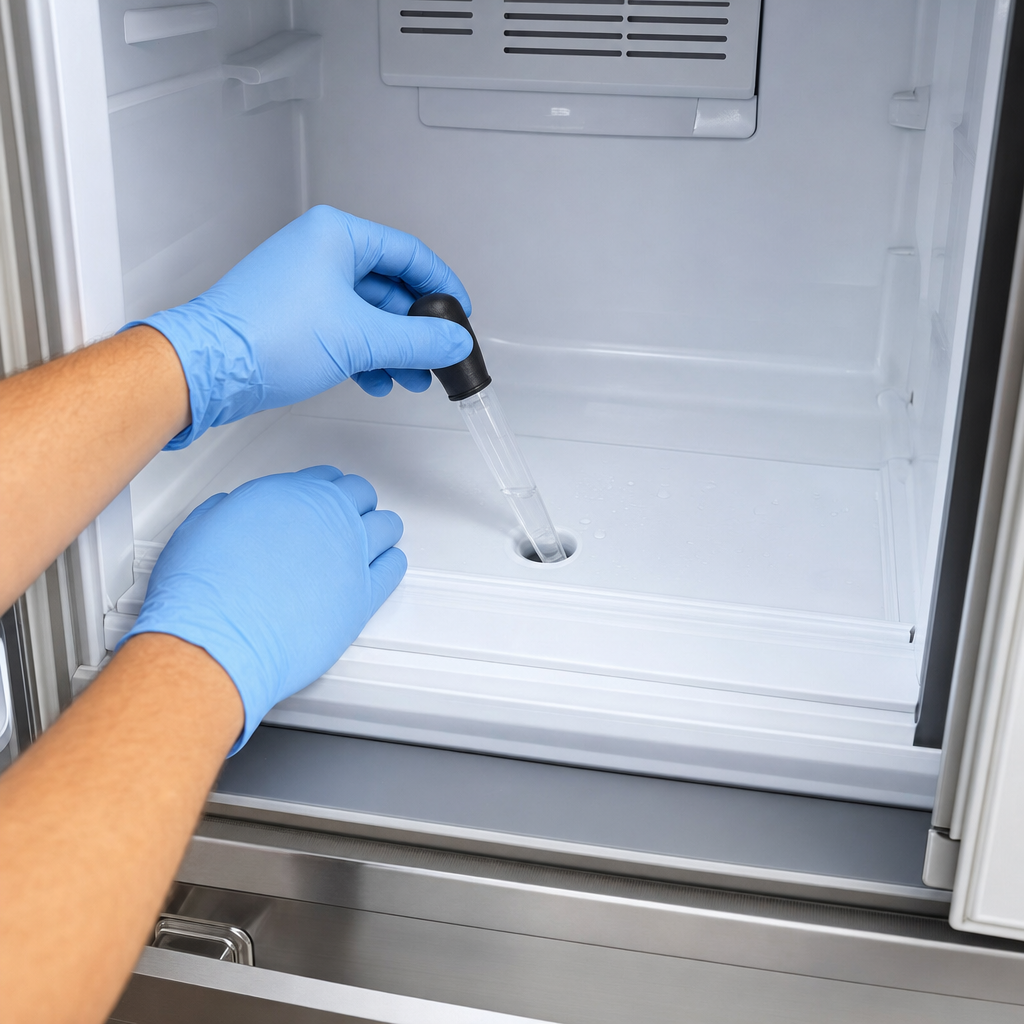
Always unplug the refrigerator before working inside the freezer compartment. Remove the freezer baskets and any ice buildup on the floor. The defrost drain hole is usually at the back of the freezer floor or behind the rear panel — check your owner's manual for the exact location on your model.
⚠️ Warning: Do not use a sharp metal tool to pick at the drain. You can puncture the drain tube or damage the plastic liner, turning a 30-minute fix into a major repair.
Fill a turkey baster with warm (not boiling) tap water. Squirt it directly into the drain hole. You may need to repeat this five to ten times to melt any internal ice plug and flush out food debris. If water drains freely afterward, you've cleared the clog. Our DIY refrigerator repair tips walk through this process in more detail.
Place a bubble level on top of the fridge. Side-to-side should read level; front-to-back should tilt slightly back (about 1/4 inch over the depth of the unit). Adjust the leveling feet at the front base — turn clockwise to raise, counterclockwise to lower.
Run your hand around the rubber gasket on both doors. Look for cracks, tears, or spots where the seal doesn't make full contact. The dollar-bill test works: close the door on a dollar bill, then pull. If it slides out with no resistance, the gasket isn't sealing in that spot.
Pull the fridge away from the wall and inspect the plastic or copper line running to the ice maker. Look for kinks, cracks, or frost. Shut off the water at the saddle valve before touching the line.
Some interior leaks go beyond a simple drain flush. Here's when it's time to bring in a manufacturer-trained technician for refrigerator repair service.
If you flushed the drain, confirmed water flows through, and the puddle comes back within a week, the problem isn't the drain itself. The defrost heater, defrost thermostat, or defrost timer may be failing — meaning the freezer isn't defrosting on schedule and ice is overwhelming the drain system.
Remove the rear interior freezer panel (unplug the fridge first). If you see a solid block of ice on the evaporator coils, the automatic defrost system has failed. This requires component-level diagnosis and part replacement.
Sweating, hissing, or unusual noises combined with interior water point to sealed-system issues. Sealed-system work requires EPA-certified refrigerant handling and specialized tools — not a DIY repair.
Your technician diagnoses the issue, then provides an exact quote — parts and labor — that doesn't change once provided. You approve the cost before any work begins. If you decline, you pay only the diagnostic fee. The diagnostic fee runs $90 to $150 depending on the appliance and is waived if you proceed with the repair.
| Scenario | Typical Cost Range | Best Choice |
|---|---|---|
| Clogged defrost drain | $150-$250 | Repair |
| Defrost heater/thermostat | $250-$400 | Repair |
| Sealed-system / compressor | $500-$1,000+ | Weigh against replacement |
| Fridge older than 12-15 years with major failure | — | Consider replacement |
A few simple habits keep the inside of your fridge dry year after year.

Flush the drain with warm water twice a year, even if you're not seeing leaks. This clears food particles before they clump into a clog. Takes 10 minutes.
Wipe the door gaskets monthly with warm soapy water. Sticky residue from spills prevents the seal from closing fully. Replace any gasket with visible tears.
Packing food tight against the rear wall blocks airflow and traps moisture against the cold interior surface. Leave an inch of clearance.
An annual check catches small issues — a weak gasket, a slow drain, an unlevel foot — before they become water on your floor. For broader guidance, see our collection of refrigerator repair articles or review the repair FAQ for common questions. If you want long-term coverage on your major appliances, the Sears Protect home warranty adds extra protection on top of our standard service guarantee.
Sears Home Services repairs most major refrigerator brands — Whirlpool, Samsung, LG, GE, Kenmore, KitchenAid, Frigidaire, Maytag, Bosch, and more — no matter where you bought it. With 1,500+ manufacturer-trained technicians averaging 10+ years of experience and over 500,000 5-star ratings, we're the #1 appliance repair service in the country. Check for same-day availability in your area.
Backed by years of experience, our technicians possess the skills necessary to fix your refrigerator. And because our techs our local, they can fix it for you fast.
Loading scheduler options...
Discover how a refrigerator works, from the cooling cycle to key components. Learn maintenance tips and know when to seek professional repair for efficient cooling.

Learn how a propane refrigerator that uses R290 refrigerant works.

Learn how a kegerator works and get answers to frequently asked questions.

Learn how a stepper motor works and how it’s used in refrigerators.
A compressor is a mechanical device that increases the pressure of a gas by reducing its volume, essential in various systems including refrigerators, air conditioners, and HVAC units for cooling and refrigeration processes.
A condenser is a component of HVAC and refrigeration systems, responsible for releasing absorbed heat from the refrigerant into the outside air or a water line, thus facilitating the cooling process.
A dual ice maker is a feature in some refrigerators that includes two separate ice makers: one in the fridge compartment and another in the freezer section. This setup doubles the appliance's ice-making capacity.
A French-door refrigerator features two doors that open side-by-side on the top section for the refrigerator compartment, with a bottom freezer drawer, combining style, efficiency, and easy access to both refrigerated and frozen goods.
The most common reasons your LG refrigerator icemaker reset button is not working are a faulty icemaker, a malfunctioning PCB, or a defective water valve.
The most common reasons your Samsung refrigerator is leaking water are a clogged defrost drain, cracked dispenser water tubing or a damaged evaporator.
The most common reasons your Kenmore Elite refrigerator stopped working are a locked compressor, damaged evaporator or a defective electronic control board.
The most common reasons your Maytag refrigerator stopped working are a locked compressor, damaged evaporator or a defective electronic control board.
The most common reasons your Kenmore refrigerator is noisy are a faulty ice maker assembly, defective electronic control board or a locked compressor.
The most common reasons your Kenmore refrigerator fan is not working are a defective electronic control board, damaged evaporator or a locked compressor.