Get Your Home and Lawn Ready for Winter: 2024 Preparation Tips

Winter is approaching, bringing cold temperatures that can take a toll on your home and yard. Taking steps now to prepare your lawn and home for the winter season protects your property from harsh weather and helps your lawn thrive when spring arrives. By addressing exterior maintenance, you can also reduce energy costs and keep your home warm and comfortable throughout the colder months.
KEY TAKEAWAYS
- Protect your home and lawn from winter weather with a few simple steps.
- Proper preparation saves on energy costs and prevents damage during colder months.
- A well-maintained yard and home will thrive when spring arrives.
How to Prepare Your Lawn for Winter
Learning how to prepare your yard for winter helps maintain a healthy lawn and garden through the colder months. Proper preparation prevents damage from harsh weather, promotes better growth in the spring, and keeps your yard looking tidy throughout winter.
Clean Up Leaves and Debris
Removing leaves, branches, and other debris from your lawn and garden beds prevents mold, disease, and encourages better air circulation, which helps your grass stay healthy.
- Rake or blow leaves to clear your lawn and garden beds.
- Remove branches and twigs that may have fallen or been trimmed.
- Dispose of debris properly to prevent pest infestations or rot.
Prepare Your Lawn
Preparing your lawn for winter requires a few key steps that can keep it healthy and ready to thrive when spring arrives.
-
Dethatch if needed:
- Dethatching removes the thick layer of dead grass, leaves, and roots that can build up over time. This allows water and nutrients to reach the grass roots more effectively.
- For small lawns: Use a regular leaf rake or dethatching rake.
- For larger lawns: Consider using an electric dethatcher or a lawn tractor dethatcher attachment.
- Skip dethatching if you have St. Augustine grass, as it naturally grows thick.
-
Aerate the soil:
- Aeration creates small holes in the soil to improve air, water, and nutrient penetration to the grass roots.
- Aerate every time you dethatch or every few years if you have St. Augustine grass.
- Rent an aerator or use a lawn tractor aerator attachment for larger areas.
-
Top-dress with enriched soil:
- Apply a thin layer of enriched topsoil over your lawn to promote healthy growth.
- Top-dressing is most effective after dethatching and aerating.
-
Fertilize for winter:
- Use a winter fertilizer to strengthen your lawn’s root system and help it withstand winter stress.
- Fertilizing also supports the growth of winter rye grass if you plan to overseed.
-
Overseed for a lush winter lawn:
- In southern regions, overseeding with winter rye grass keeps lawns green throughout the winter.
- Water the lawn for three consecutive days after planting rye grass seeds to encourage germination.
- Use a drop spreader for consistent coverage, or a broadcast spreader if that is unavailable. Avoid overseeding thick St. Augustine grass, as the seeds may not reach the soil.

Trim and Prune Trees and Shrubs
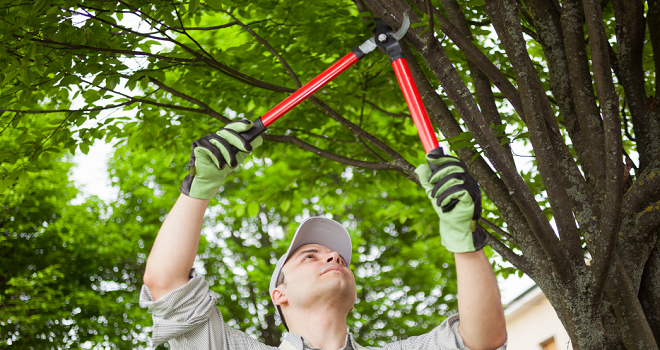
Pruning trees and shrubs helps prevent damage from heavy snow or ice and promotes healthy growth in the spring.
- Prune dead or damaged branches to avoid falling hazards during winter storms.
- Trim back perennials and bushes to keep them tidy and encourage robust growth when the weather warms up.
Protecting Flower Beds and Potted Plants for Winter
Taking steps to protect flower beds and potted plants helps them survive the winter and thrive when warmer weather returns. Some plants need more care to withstand cold temperatures, so it's important to prepare them properly.
Prepare Flower Beds
Flower beds need attention before winter to protect both the soil and the plants. Taking these steps helps keep roots warm and prevents damage from frost.
- Remove annual plants that won’t survive the winter. This reduces debris and makes room for new growth in the spring.
- Mulch perennial plants to insulate the roots from freezing temperatures. A layer of 2-4 inches of mulch helps retain moisture and provides a protective barrier against the cold.
- Cover sensitive plants with burlap or frost blankets when temperatures drop. This adds an extra layer of protection against frost and freezing winds.
Care for Outdoor Potted Plants
Potted plants are more vulnerable to freezing because they lack the insulation that garden soil provides. Moving them to a safer location and elevating them off the ground can prevent damage from cold temperatures.
- Bring sensitive potted plants indoors or move them into a protected area such as a garage or shed. This keeps them safe from freezing temperatures and harsh winds.
- Elevate pots off the ground to prevent them from freezing to surfaces. Placing pots on stands or trays allows for better drainage and keeps the roots from getting too cold.
By following these steps, flower beds and potted plants can better endure winter conditions and be ready to flourish when spring arrives.
Winterize Your Outdoor Plumbing
Preparing outdoor plumbing for winter prevents freezing and potential damage. When water is left in hoses, pipes, or irrigation systems, it can freeze and expand, leading to cracks and costly repairs. Follow these steps to protect your outdoor plumbing from cold weather.
Drain and Store Hoses
To prevent freezing and cracking, all outdoor hoses should be drained and stored indoors.
- Disconnect hoses from outdoor faucets and lay them out straight.
- Drain any remaining water by holding one end higher than the other to allow gravity to pull the water out.
- Store hoses indoors in a garage, shed, or basement. Keeping them indoors helps hoses stay flexible and ready for use when the weather warms up.
Winterize Your Irrigation System
Irrigation systems are especially vulnerable to freezing temperatures. Proper winterization prevents pipes and sprinkler heads from cracking.
- Shut off the water supply to the irrigation system at the main valve.
- Drain the system by opening all manual drain valves and letting the water flow out. If your system has automatic drain valves, activate them to remove water from the lines.
- Blow out remaining water using compressed air. This step helps ensure that all water is removed from the pipes and sprinkler heads, preventing them from freezing and bursting.

Taking the time to drain and store hoses and winterize your irrigation system can save you from unexpected repairs.
Inspect and Maintain Your Home's Exterior for Winter
Preparing your home’s exterior for winter helps to prevent drafts, leaks, and other issues that can arise during colder months. Regular inspections and maintenance will keep your home warm, secure, and free from weather-related damage.
Inspect and Clean Gutters
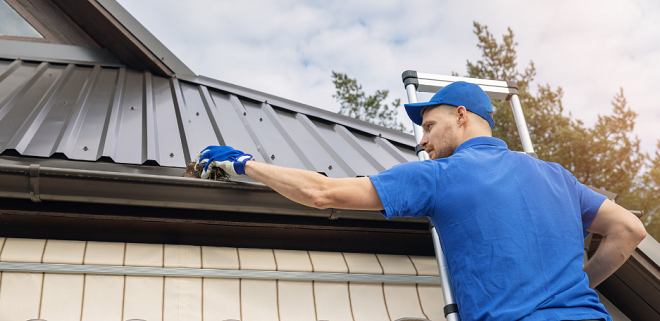
Keeping gutters clean is vital for preventing ice dams and water damage. Clogged gutters can lead to water overflow, which may freeze and cause ice dams that damage your roof and walls.
- Remove leaves and debris from gutters and downspouts to maintain proper water flow.
- Check for any signs of damage such as cracks or sagging gutters, and make necessary repairs.
Check Your Home's Exterior
Examining your home’s exterior for gaps and openings helps prevent drafts and keeps your home well-insulated. Addressing these issues before winter can save on energy costs and protect your home from damage.
Siding
Damaged siding can lead to drafts and inadequate insulation, allowing cold air to seep into your home. Regularly checking your siding can help you identify and fix problems before they escalate.
- Look for cracks or holes in the siding material that could let in cold air.
- Check for warped or buckled siding that may indicate moisture damage or wear.
- Make sure all siding panels are secure, with no loose panels that could expose insulation.
- Inspect joints and seams for gaps or separations that could cause drafts.
- Check for rot or decay in siding, fascia, and soffits, which can compromise your home’s exterior.
If you discover significant siding issues, it may be best to consult a professional.
Windows
Windows are common sources of drafts if not properly sealed. Inspecting and sealing any gaps or leaks around windows can make a significant difference in keeping your home warm.
- Check weather stripping and seals for any visible damage. Replace or repair them if they are worn out.
- Seal gaps or leaks using caulk, weather stripping, or foam sealant, depending on the size and location of the openings.
If you find that many windows have air leaks, consider replacing them with new, energy-efficient models.
Roof
A damaged roof can cause significant issues, including drafts and water leaks that harm your home’s insulation and interior structure. Regular roof inspections help catch these problems early.
- Use binoculars to inspect the roof for curled, cracked, distorted, buckled, or missing shingles.
- Check gutters and the ground below downspouts for granules from shingles, which can indicate wear.
- Look inside your attic for any daylight coming through the roof, a sign that repairs are needed.
If you notice any signs of roof damage, consider professional help.
By thoroughly inspecting and maintaining your home’s exterior, you can protect it from winter weather and keep it in excellent condition all year long.
Was this information helpful?
Siding Resources
Find the average cost of vinyl siding in 2024 and what affects the price.
Discover how Ascend Cladding revolutionizes your siding options.
Maintain the value and appearance of your home with our expert guide on how to take care of vinyl siding.
Vinyl siding offers cold-climate homes durable protection against harsh winter weather while enhancing curb appeal and improving energy efficiency.
Glossary Terms
A furnace filter is a component installed in HVAC systems to trap and remove dust, pollen, and other airborne particles from the air, enhancing indoor air quality and protecting the furnace's inner workings.
Hard water is water that contains high levels of dissolved minerals, particularly calcium and magnesium. It contrasts with soft water, which has lower concentrations of these minerals.
A garbage disposal is a device installed under a kitchen sink that shreds food waste into small enough pieces to pass through plumbing, facilitating an easier and more hygienic kitchen waste management process.
A washing machine pedestal is a platform that raises the washer off the ground, providing easier access to the appliances and often includes additional storage space such as drawers.
Common Appliance Symptoms
The most common reasons your Whirlpool washer won't stop filling are a clogged water valve, a bad water-level pressure switch, or a malfunctioning electronic control board.
The most common reasons your Whirlpool washer won't spin or drain are a seized gearcase, a broken motor, or a failed door switch.
The most common reasons your Whirlpool washer won't turn off are a malfunctioning electronic control board, broken motor or a jammed door lock assembly.
The most common reasons your Whirlpool washer won't start cycle are a malfunctioning electronic control board, jammed door lock assembly or a faulty user interface.
The most common reasons your Whirlpool washer vibrates are a damaged suspension rod, malfunctioning electronic control board or a dead fan.
The most common reasons your Whirlpool washer is experiencing the rinse cycle not working are a broken lid switch, a bad water-level pressure switch, or a malfunctioning electronic control board.


